Chapter Two opens with three small scenes that take place at a different time than the present.
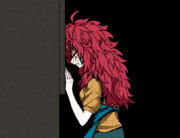
The first is Gin, lying on the floor next to Q-taro, apologizing to him, his mother, and Sara.

The next is between Kai and the man he works for, Sara's "father". The two reminisce on their time together and Sara's father gives him a new apron, thanking him for his service. Her father entrusts Sara to Kai, should it come to it, revealing to the player that Sara is not biologically related to her father. Kai ensures she has his protection and affection. Sara's father begins to lose himself, and Kai comments that he has a bit of tunnel vision when it comes to his Sara.
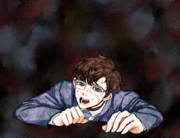
This transitions into a scene of Joe and Sara chatting in class. He offers to take her out to food in exchange for showing him her homework. Sara chastises him for not doing his work at home, and after a small bout of him complaining, the scene shifts into Sara's hallucination of Joe taunting her for causing his death. Sara pleads with the hallucination to let her be and wakes up from the nightmare in an unfamiliar bedroom.
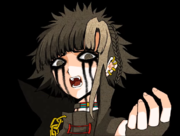
Sara catches her gaze in the window, realizing how lifeless she looks. Blood begins to pool on Sara's bed sheets, and an apparition of Joe appears in the window. Soon after, blood spreads through the room as Mishima's head and Kai's body fade into the chairs in the room. Sara shouts at "Joe" and injures herself trying to get away from the scene. The apparition of Joe starts to suffocate her, and then Keiji snaps her out of her hallucination, the room returning to normal.

Keiji asks what happened, and Sara discloses her hallucination. Keiji tells her they're on the third floor, and instructs her to sleep a little longer, which Sara is uncomfortable with. Keiji lets Sara rest on his shoulder, and after she falls asleep, he voices his concern for her, making the player aware that he, too, experiences hallucinations.
Upon reawakening, Keiji recommends Sara go and see the others, which she agrees to. A new mechanic is introduced: the Hallucination Level. This indicates Sara's mental state and will go up whenever she remembers Joe.
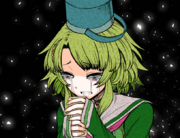
When she enters the lobby, Sara hears Reko singing and engages conversation with Alice, who is standing off to the side. He comments that Reko is singing with grief for the dead, and asks Sara what she thinks of Reko. He says that ever since she was a kid, she was very charismatic and harsh to the people around her. Keiji asks if she changed due to Alice's arrest, which he admits to. Reko, Nao, and Gin all notice Sara, and are very glad to see her up and about.
Gin informs Sara that Miley's disappeared, and Sara reckons they should investigate. Keiji and Gin follow her.
They find Q-taro in the ruined corridor, and Q-taro attempts to comfort and cheer up Sara. In the Relaxation Room, they see Alice sitting next to a courtyard with fake foliage and sunlight, which he voices his distaste for.
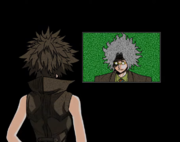
The final room is filled with monitors. One of them flickers on, displaying an image of Mishima. He begins to speak, recognizing Nao, but not the other participants. Sara asks if he's real or not, and Mishima says that he's an artificial intelligence made from the emotions and memories of Mishima. Keiji comments that there's a photo of him on the back of the monitor. Incensed, Sara looks for one with a photo of Joe, but there isn't one, and Kanna says there's not one of her sister, either.
An image of a woman with green hair fills all of the other empty monitors and admonishes a person named Ranger for turning on the AIs prematurely. The person in question comes up from behind the participants, and introduces himself as Rio Ranger, saying he will support them on this floor as Floor Master. Ranger calls out for Safalin, the woman on the screen, and she arrives to introduce herself as Tia Safalin, the Vice Floor Master.
Ranger begins to explain the rules of the floor, revealing a second Main Game will be taking place. Sara becomes enraged with Ranger for wearing the accessories of the deceased, and he starts to condescend to the participants, dead and alive.
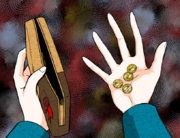
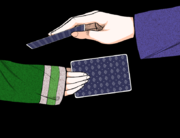
Upon stepping into the prize room, Sara is met with another doll. Ranger explains that he's the receptionist, and Safalin gives out wallets containing 100 Me-Tokens to each participant. S he then says that the participants cannot use their own tokens to buy prizes, and must trade with others to obtain their tokens to use as currency. Safalin then explains that there are nine attractions around the floor, in which the participants will receive clear chips for beating. Each person must earn a total of ten clear chips to proceed to the main game and the attractions can only be played once. Sara must do every attraction before time is up.
Ranger states that there's a grand prize of a ticket to the surface and that they have three days to collect all needed clear chips.
With this explanation, the sub game, the Trust Barter game, begins.
At the prize counter, Sara can purchase clear chips, victim videos,and a ticket to make attractions easier, as well as personal information for the rest of the participants.
Upon returning to the monitor room, the gang finds that a monitor has been broken, and the photo on the back has been torn off. Nao comments that she hasn't seen Sou in a while, casting suspicion on him as the culprit. Kanna offers to search for Sou while the others search for attractions. She promises to keep an eye on him, but Reko and Sara seem reluctant. Alice interrupts the tense atmosphere, stating that the kidnappers want this sort of conflict. Sara realizes that she's been putting the blame for Joe's death onto Sou and Kanna. She and Kanna reconcile.
If Sara hadn't interacted with Kanna before speaking with the Mishima AI, Sara and the others go and complete an attraction in search for Sou. Once they don't find him, they all return to the lobby where Kanna pleads for the others to allow her to search for Sou.
Kanna states that she isn't an innocent party and that she "tipped the scales." She explains that before the Main Game, Kanna had initially pulled the Sacrifice card. Sou told her to toss it away, saying that the rule that implies death if you tell someone else your role is false. He asks Kanna to give him the card and exchanges it for a Commoner card. Kanna thought that because Sou seemed to have knowledge of the Main Game, which proved to be true, he should've been kept alive instead of Kai.
Sara tells the group that she had spotted Sou's Sacrifice card earlier, when he was knocked out, proving that the rule was a dummy, as he did not die. Gin points out that Sou was knocked out before he rested with Kanna, saying the order doesn't make sense. Sara figures that Sou took both the Sacrifice and Commoner cards, set the Sacrifice for Kanna to find, and arranged the trade to put Kanna in his debt. Keiji finishes by stating that it's possible Sou purposefully led Joe into picking up the Sacrifice.
Sara, Keiji, Gin, Reko, and Kanna leave the monitor room, while Nao remains to speak to Mishima. The group decides to search for Sou, and finds his beanie in the Ruined Corridor. They reason that he might be in one of the attractions that had just opened, so Sara decides to search in either Charge Card Battle, Memory Dance, or Arm-Wrestling with a partner of her choice. She doesn't find Sou, but Reko or Q-taro runs back to Sara, having found Sou in his bedroom.
Sou is passed out with wood chips on his head and a plank of wood on the bed, which was presumably used to knock him out, similar to what happened to him in the Hidden Room. Upon waking up, he claims amnesia, only remembering up until before the first Main Game. When told they've already lived through the Main Game, he panics about who died, listing off people who aren't in the room. He mentions Joe, which causes Sara to hallucinate again, and she wakes up in the lobby.
The group lament about Sou's lack of cooperation, and Kanna asks if they'll let her handle it. Keiji gives her the okay, and warns her to be careful. Reko seems hesitant to let her hang around with Sou.
The Negotiations mechanic begins. After beating a Death Attraction, Sara can choose to negotiate with one of the options in the lobby, and will have an interaction with one of them. These can vary from a token trade, to a conversation, to organizing deals with others. Sara also has the option to not negotiate. In the first negotiation, Sara can choose to speak with Keiji, hang out with Gin, or organize a trade with Alice to get him Reko's tokens.
Sara goes to see Nao talking to the Mishima AI. He congratulates her for having made such great friends even in the Death Game. Nao voices concern about always being saved by the others, and tells Mishima that she's not going to come back to the monitor room to speak with him again. Mishima, after telling Nao that she's grown strong, shuts off, leaving a crying, but resolved Nao in his wake.
In returning to the lobby, Sara finds Q-taro arguing with Ranger. He tells Sara that the participants are not permitted to return to the first floor. Sara realizes that this means they can't recover the laptop, and Ranger says they'll just confiscate it. Keiji figures that Q-taro wants to find out the truth about Kai.
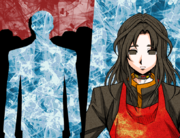
Sara wonders about Kai's alignment, and Keiji says they can infer certain things about Kai. He posits three possibilities: the first is that Kai was a bad guy, on the side of the kidnappers, which Sara has a hard time believing. The second is that Kai was on the side of the participants, but had communication with the kidnappers. He states that for Kai's First Trial, his task may have been to ensnare the other participants. The last, which Keiji is inclined to believe, is that there's an ally on the side of the kidnappers, a traitor among them, who was in contact with Kai.
Sara asks Keiji if he's aware of a similar case to the Death Game. He brings up an old case from decades prior, about major crime rings fighting for dominance. They executed a plan to form into one single crime syndicate, via a death game. Representatives from the rings fought to the death, and the survivor reigned supreme. The case is referred to as the Hades Incident. However, the organization supposedly collapsed due to the work of the police.
Sara decides to go search for more attractions. She finds Sou and Kanna in the monitor room, and Sou notes that three new attractions have opened up-- Runaway Minecart. Stay on Target, and Hide and Seek. The pair exit, leaving Sara alone.
Sara can choose to speak with Mishima at this point. He has his memories up until the start of the Death Game, knows nothing of the kidnappers, and is acutely aware he is an AI. He asks Sara to watch over Nao.
In heading to the Recreation Room, Sara finds three more attractions-- Quick Draw, Fly Swatter, and Spirit Shutter. She decides to play through more attractions. After beating one, she has the opportunity to negotiate a three-way token trade with Reko and Nao, or have a conversation with Kanna about her sister.
After this, Gin and Keiji show back up in the lobby, Gin injured after an attraction. Safalin appears to offer to treat Gin, but the two elders are hesitant to trust her. Sara suggests they try trusting her and she leads them to the Medical Office. As Keiji treats Gin, Safalin offers a salve to speed up healing and demonstrates its effectiveness by cutting open her own hand and applying it.
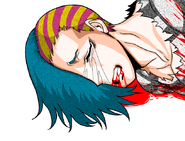
Keiji and Gin speak in whispers, Gin asking Keiji if he should show Sara something, and Keiji says he shouldn't. If Sara pushes the issue, Gin will reveal a dog keychain, the same one that Joe wore. Her hallucinations worsen. A thankful Sara asks Gin if she can keep it, which Keiji halfheartedly resigns to. Despite being happy, Sara is still tortured by the memory of Joe's death. With this, Day One ends, and night begins.
Reko signals Sara over to her. She says she found a weird place and wants to show Sara first. She shows her a dark room with a vending machine at the top of a set of stairs, with the number 200 displayed above it. Sara reasons that means they need to put 200 tokens in the vending machine to get it to work. Reko and Sara leave.
Sara does another attraction. In the third negotiation, Sara can choose to trade tokens with Q-taro, talk over tea with Reko, or play with Gin. After this, she goes to bed, but is awoken by a commotion outside. In the lobby, Gin tells her that the old guy has been killed. In the monitor room, Mishima's screen has been destroyed. Kanna asserts that Sou wasn't the one who broke the monitor, as they were together the whole time, even sleeping in the same room. Nao enters the room, and upon seeing the broken screen, asks the group not to search for the culprit. Gin notes that there are no clues this time, unlike when the first monitor was broken when there were wood chips scattered around. The group break up and go back to their rooms. The first night ends.
The second day begins with Sara finding Keiji questioning Reko about the monitor. She denies doing anything and tells of Keiji. Afterward, she takes Sara to the Long Stairs they found before with the vending machine. She shows Sara a red button with "bonus attraction" written above it. This opens a door to the tenth attraction: the Room of Lies. Surprised, Reko states there's only supposed to be nine attractions. She brings up the number of Clear Chips obtained from the other nine attractions. Since there are nine surviving participants, and all attractions must be done in pairs, each attraction will end up with one person unable to do it. The number of Clear Chips is not enough for all of the participants to get ten each. The Bonus Attraction, with its six chip prize, rounds out the number. Reko decides to go into the Room of Lies, and Sara offers to join her, but Reko is hesitant because she feels like she keeps getting saved by Sara.
The two shake hands, and Sara notices that her hand is bleeding. She realizes Reko has been pushing herself through attractions for the sake of people like Gin and Nao.
Inside the Room of Lies, there's a single table with the Clear Chips, a wire rope, and a note that reads "this is the Web of Happiness. In the final attraction, it just might save your life." Sara takes the rope, and Reko takes the chips. After this, the lights go out. Sara grabs Reko's hand and runs for the exit, only to find that once safe, she's left holding Reko's glove. Right when she starts to panic, Reko reappears. They wonder what the "lie" in the room was, speculating it may be the Clear Chips. After this, Sara notices Reko is still wearing two gloves. Reko claims no one grabbed her hand in the room. Sara gives her back her glove after she explains that Ranger gave them all changes of clothes. Somewhat suspicious, Sara heads to look for Keiji.
In the Medical Office, Sara notices a reflection of Joe in the mirror. Looking at him worsens her hallucinations. As she approaches, the hallucination only gets more clear. She pulls back the mirror, revealing a lifelike doll of Joe standing behind it. Safalin appears to admonish her, explaining that the dolls are experiments done by her organization, and one of their purposes are mental relief. As she starts to provoke and manipulate Sara about taking the doll, Keiji interrupts her. Safalin, before leaving, tells Sara that she has a device for relief, should her hallucinations get too bad. Sara and Keiji sit down together, and Keiji asks if she liked Joe. She states he was a close friend to her. Sara remembers that Keiji had said he had someone important to him as well and that he would tell Sara about if they both survived the Main Game.
Keiji tells a story from his time in grade school. He says that as a child, he rode his mother's errand bike when he needed to get places. One day, he fell off, and the bike went into the river. Upset, Keiji started to cry, catching the attention of the neighborhood policeman. He dove into the river to retrieve the bike, then spent hours fixing it. Keiji reveals that the officer was his hero, and what made him want to be a policeman. If Sara asks if they were able to meet again. Keiji, looking unsettled, says there are lots of different policemen in the world. He then makes sure Sara is okay before leaving.
The player has the opportunity to get a game over with Safalin's mental relief device. The device can be used safely once to help Sara forget about her hallucinations and bring the hallucination level down. If the player, and by extension Sara, forgoes the warning and continues to use the device several more times, she experiences mind break, and the game ends.
Sara does another attraction. In the fourth negotiation, she can discuss with Kanna and Sou, or talk about Reko with Nao.
After, Q-taro runs into the lobby to find Sara and asks her to come into the ruined corridor. He shows her a path through the rubble, which leads to a dark room with a monitor and a chair. Keiji comes in after her, revealing Q-taro found Kai's laptop in the room. Sara is confused as to how it ended up there. Keiji reasons Kai put it there himself. They open up the laptop, and the battery is worryingly low.
Sara types in "chidouin" for the password, and it's incorrect. The group figure Kai changed the password since Sou definitely saw the contents. Keiji implores Sara to type in only something she should know. She types in her father's name, and it unlocks. From this, Sara infers Kai knew her father. They check Kai's sent emails.
They find Sou wasn't lying about the emails, but he read them in the wrong order. The group realizes that there must be received emails as well. The first is a cutesy email about Sara going to a board game meet up, with the sender worried she'll make bad friends. This was what the "Sara is looking forward to the games" email referred to. The typing style, along with the sign-off "Thankies a million," alerts Sara to the fact that her father is the one sending the emails. The second is a threatening email, about how Kai betrayed the organization. This was what the "I will stand against even you as an enemy" email referred to. The third is about how the sender, Sara's father, feels unsafe, and how he should discard their house and run. He asks Kai if he'll come with. This is what the "I am prepared to offer myself up" email referred to. Sara realizes that her father knew something was going to happen. The fourth is a frustrated sender asking for a report. This is what the "17 people have been secured" email referred to. The sender confirms that Kai's efforts were futile, and he is aware that Kai was pretending to be his contact in order to deceive him and disrupt the Death Game. The sender says Kai fell for the trap, and that Sara will be captured. The email ends with a sinister "Thankies a million." The email is dated for the day of the kidnapping.
Keiji summarizes that Kai was in contact with two people-- one of Kai's parents, and Sara's father. His plan was exposed and crumbled. Sara realizes that Kai was never a stalker, he was guarding her to protect her from the kidnappers. She remembers what she heard the stalker saying the night she and Joe were kidnapped-- "Don't go home!!!"
The laptop's battery dies.
Keiji wonders if the information that Kai was on their side is beneficial to them. The three decide not to tell the others about the laptop for now, and Q-taro is entrusted with its safety.
When she returns to the lobby, Sara finds Kanna alone. She says Alice is looking over a sleeping Sou and asks Sara if she can come with her to a room she found in the Ruined Corridor. However, this room is through a passage in the back, rather than the rubble. Kanna slips up and accidentally refers to Sara as her sister. She says Sara reminds her of her sister, and Sara holds her hand tightly. They come to a room with a set of beds that Sara enters first and finds familiar. When she turns around, she realizes that she's in the First Trial room, however, it's a little different. Kanna enters after her, and upon recognizing the very room her sister died in, she starts having flashbacks to her own First Trial. Sara advises she wait outside, and Kanna complies.
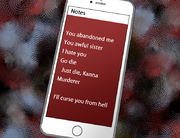
Sara finds a smartphone under the middle bed with a message supposedly from Kanna's sister, Kugie, written moments before her death. In it, Kugie condemns Kanna to Hell and says Kugie hates her. Sara's start causes Kanna to come in, and she's too shaken to do anything to the phone. In a last-ditch effort, she yells to Kanna that someone's coming as misdirection and re-hides the phone under the bed. Sou shows up with Alice, claiming to look for Kanna so the three can trade tokens between them. The group leaves, Sara promises to herself to recover the phone later.
Sara does another attraction. In the fifth negotiation, Sara can talk with Q-taro or trade tokens with Nao or Reko.

After, she decides to go collect the phone. The room is empty, and Sou comes up behind Sara, holding the phone. Sou posits that Sara was going to use the phone to manipulate Kanna, stating the impossibility that Kanna's sister wrote the message herself and that Sara wrote it to put Kanna in her pocket. Sou had seen Sara hide the phone under the bed. But Sara says she only hid it from Kanna for Kanna's sake. However, Sou says Kanna would've come back to the room to search it eventually.
Sou's been mystified by Sara's methods of gathering trust, ever since the Main Game, smugly revealing that he'd never lost his memories. He continues to antagonize Sara until she tries to take the phone back by force. But upon looking at the screen, she finds that the message has been changed to an encouraging one rather than a disparaging one. In her surprise, Sou steals back the phone, vowing to not let Sara do as she wishes anymore.
In the Monitor Room, Sara finds a disgruntled Keiji demanding an explanation from Q-taro. In following them out of the room and into the lobby, Keiji tells Sara that the laptop's been taken. Q-taro admits to giving it to Kanna. They realize Sou probably orchestrated the trade, and Keiji and Sara go into the Ruined Corridor to find Kanna.
Sou appears, and the mood goes tense. Keiji demands the laptop back, and Sou claims he has some possession over it as the first one to find it, then reveals he has a charger. Kanna says that if she gave Sou the laptop, he promised he'd give her the phone. They trade. After reading the kind message on the phone, a relieved Kanna cries tears of salvation. Sara suspects Sou wrote the message for Kanna.
Keiji brings up that they can't know if Sou's on their side or not, and claims that they've never seen his collar since he always wears a scarf. Changing tactics, Sou says he'll give the laptop back if Keiji trades 50 tokens, enough to buy his personal info, which Keiji seems very hesitant to do. Sou says that it's fine if Keiji gives the 50 tokens to Sara, and goads Keiji into doing so. Keiji remains silent, effectively refusing. Sou mockingly apologizes for teasing Keiji and shows him the collar on his neck before he and Kanna leave.
Things become awkward between Sara and Keiji. She believes that Keiji doesn't trust her, and leaves him alone, hurt and bothered, but trying not to show it. She returns to her room and passes out from exhaustion. Her pillow is damp from crying when she next wakes. She decides to continue with attractions.
In the sixth negotiation, Sara can speak with Keiji about his lack of trust in others, or play with Gin.
After, Gin says he found a pale Nao in the monitor room. Nao reveals that she bought a victim video, but is too scared to watch it alone. Sara decides to watch it with her. The video depicts a woman bound by ropes in a police uniform, who says she was only doing her duties. A man starts speaking and moves into the shot. While only the back of his head is visible, it's enough to recognizably be Keiji. The man says he can't move forward without resolving this first. The woman begs him to press the button, but he hesitates, and the chains pull the woman to death, ending the video. Sara has an anagnorisis, realizing how much the Death Game has affected her, and how she was barely fazed watching the woman die as she was more concerned about the man's identity. Nao hugs her gently to support her.
The second day ends.
The third day opens on Alice arguing over breakfast with Safalin, and he and Sara share a meal. Alice opens up about Reko, saying that initially, he thought Reko had greatly changed. Now, he realizes that she's the same as always. Alice brings out a newspaper clipping about how Samurai Yaiba broke up after Alice's arrest, and Reko couldn't bring herself to sing their songs. Alice gives Sara the article after realizing that instead of dwelling on it, he needs to confront Reko herself. Sara continues with the attractions.
In the seventh negotiation, Q-taro is the only option. He offers Sara 40 tokens for ten of hers. He appears unsettled and desperate and refuses to look Sara in the eyes. Sara notices something is off. She can refuse, or comply with the trade. If she gives him the tokens, the player unlocks a game over. Q-taro uses the 200 tokens for the vending machine and takes the chance to escape, leaving behind all the other participants. If she refuses, Q-taro leaves to calm himself down.
Ranger appears to talk with Sara. She asks him about the AIs they can buy, and he says they're detailed reproductions of the participants, with emotional capabilities. Their memories are updated every six months, and their personalities every three years. Ranger reveals that all of the participants have been watched closely for several years. Although the AIs were meant to be updated daily during the Death Game, they couldn't include them in the Mishima AI, since memories of his own death bugged out its code. Ranger leaves Sara, bewildered, with more questions than answers, and she decides to go do more attractions.
In the eighth negotiation, Sara sees a hallucination of Kai, Joe, and Mishima. The safest option is not to discuss. If this is not done, Sara is forced to relive their deaths and her hallucination level increases.
Gin wakes up a fitful Sara from the nightmare she was experiencing. Her hallucinations worsen. Sara figures she needs to put on a brave face for Gin, but he says that it's okay not to smile, and Sara deserves to rest and believe in the rest of the group.
Sara counts her clear chips, making sure she has ten. She does-- she's safe, for now. Sara wakes up in her bed, having fallen asleep without realizing it. Her body feels incredibly heavy, and when she looks around, she sees Miley place something on the chair before leaving. When she wakes up for a second time, she finds four pieces of paper on the chair, with percentages, names, and occupations, just like the one Gin brought in the first Main Game. Because there are 16 names, and 20 participants, Sara reasons a page is missing. She notes one line in particular-- Keiji Shinogi, Ex-Detective. She puts it away and goes to find the others.
Everyone comes to the lobby, each with enough Clear Chips. Ranger shows them a new door, the last part of the Sub-Game.
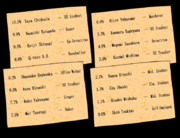
He starts to split the participants into groups based on the number of tokens they got while trading. Q-taro got the most, and will be awarded a "special privilege." After Q-taro, the top three are Kanna, Alice, and Sou, then Keiji follows. Sara, Nao, and Reko, "the three idiot girls" come second to last. And Gin earned the least.
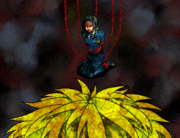
As punishment, Gin and Q-taro are pinned to opposite sides of a target. The middle-earners are trapped in a cage, and Sara, Nao, and Reko rise up into the Impression Room. They're elevated above everyone else.
It's time for the final attraction-- The Arbitration Room.
A timer will begin and when it stops, Gin, the lowest scorer, will be shot with the venom of a Rikuto giant scorpion. Q-taro, on the other side, has the ability to press a button and switch places with Gin. Nao, Reko, and Sara are left to conjure up the means of escape from the Impression Room, for themselves, and Gin.
There are two LCD monitors, one displaying the timer, and one displaying the phrase "Left: 35.5." The girls realize that since this is an attraction, there must be a way to beat it and save Gin. After settling down, they turn their attention to the screens, trying to figure out the meaning behind 35.5.
Nao figures they need to come up with the unit, and Reko thinks they should find out what exactly it refers to. Sara posits it's weight, and Nao says that 35.5 kilograms is the approximate weight of an average grade-schooler. In talking to Reko, they realize the number is probably Gin's weight, who confirms it. Their next avenue of discussion is how to change the number. Reko recommends they all jump in the air, which should cause the weight to fluctuate. Reko jumps, but nothing changes.
Reko gives up, but Nao disagrees. Her and Sara figure that the Impression Room is to penalize the flunking students. She's convinced that their room is connected to a means of rescue for Gin. Reko stubbornly insists that nothing they do has meaning, and to prove it, she jumps again. This time, however, Sara notices an odd noise from the floor. The girls spot a loose tile, and when they pry it up, they find a large pit with spikes in it.
The back of the title says "to rescue." A bit of the tile breaks off and falls into the spikes below, which changes the number on the display to 35.3. Sara realizes that at the bottom of the pit,there's a scale as well as the spikes. Ranger confirms this. He asks the girls what they're going to use as a weight to lower the number to zero.

Nao realizes that someone is going to need to fall. Their weight will hold down the switch and rescue Gin. Reko is in disbelief that they must sacrifice someone. Safalin notes that they're lucky, because if Q-taro had been in last, all three of them would need to descend to match his weight, instead of just one. Sara picks up on the word "descend." The dolls say they're now burdened with the decision of which of them to sacrifice.
Keiji interrupts Ranger and reminds the girls that earlier, Ranger had said if they did well in the Sub-Game, no one would have to die. Sara brings out the rope that she got in the Room of Lies. Safalin had said "descend," not "fall," and Sara says they can use the rope to stand between the spikes. Nao seems extremely hesitant to use the rope from the room.
Reko pulls firmly on the Web of Happiness, and it snaps. The rope was the lie all along.
Sara, out of options, feels like she must decide on who to sacrifice. The voices of Joe, Kai, and Mishima cuts through her despairing thoughts, saying that her death would waste the feelings entrusted to her, and calling her Steelmind. With renewed vigor, she pushes to keep working to save Gin.
Reko, disheartened, claims there's nothing more they can do for Gin, and this is the end of the line. A suspicious Nao retorts that Reko would never speak like that and that Reko's changed so much from how she behaved earlier, it's almost as if she's not Reko at all! Sara pleads for them not to quarrel, but Nao won't back down. She brings a new piece of testimony to the table: Reko was the one who broke Mishima's monitor.
Nao reveals that despite what she had said earlier in the chapter, she still went to go see the Mishima AI. But she couldn't bring herself to enter the monitor room, at which point she saw Reko, bleeding from the hand with glass embedded in her skin. Sara turns the question of legitimacy to Keiji, who confirms that he saw Reko shatter the screen. Reko continues to vehemently deny involvement.
Time continues to tick down as it's time for the poison to be shot into Gin. All parties panic as Gin cries out in pain after getting stung. Ranger mocks Q-taro over protecting himself over Gin, then reveals that there are five stingers in all, set up to shoot periodically, but one isn't enough to kill someone. He submits that a child could probably handle two.
Keiji insists Reko tell the truth about the monitor, but she claims to have no memory at all of breaking it. Keiji recounts the conversation between Reko and Mishima, where Mishima asks Reko to destroy him for Nao's sake, and her resolve. Reko swung and destroyed the screen, but couldn't tell Nao.
Reko, sweating and nervous, claims genuinely to have no idea what he's talking about. To prove her innocence, she removes her gloves, and reveals no wounds on her hands, shocking Keiji and Nao. Reko asks if they were seeing a fake. Sou reasons there must be one and puts forward that a fake Reko was the one who broke the monitor.
Keiji asserts that the Reko in the monitor room was real, and Sou thinks he's wrong and that whomever has a scar on their hand is the fake. Sara reasons that Ranger could've been the fake, since he wears gloves. Kanna says Reko kept her clothes safely hidden, so none of the participants could've dressed up in hers. Since the Floor Masters brought the clothes, Ranger is the prime suspect as the fake, as he would have access to them.
Ranger finds this accusation amusing and claims he would never wear the clothes of a living human. He shows the group an uninjured hand. Nao says they've wasted their time in vain, but Keiji disagrees. He reasons that the Floor Masters can't lie about important aspects of the game. He picked up that when Ranger said that the Reko in the monitor room was the real deal, instead of outright saying there was no fake. Keiji goads him on, but Ranger can't say anything refuting it. Keiji asserts boldly that there was indeed a fake.
He reminds Sara to think about the following: if the Reko with an injury is real, then who's the identity of the fake? Sara realizes the Reko with them in the Impression Room is the impostor-- then recalls how she had noticed Reko's injury before the Room of Lies as well. Reko panics before Alice cuts in, protecting Reko and yelling that, as her brother, he recognizes that she's the genuine Reko.
Nao points out that they can save Gin by dropping the fake. This sends the group into a tizzy, The next main question is: if Reko was swapped for the fake, when and where did it happen?
Sara presents the broken Web of Happiness as proof of the two entering the Room of Lies together. When she grabbed it, the lights went out immediately, and when she ran out, she was left holding Reko's empty glove. This Reko returned with both gloves intact, which Sara uses as proof that the switch was the real lie.
Desperate, Reko asks Sara to prove who she is, if she's not Reko. The number of people on the floor don't match up to suggest that someone is taking her place. Safalin confirms that no human they haven't met is on the floor. And Alice continues to assert that this is the real Reko.
Reko claims that if she's a fake, Sara could be as well-- after all, they went into the Room of Lies together. Reko goes on the offensive, trying to appeal to Nao. Sara invites her to debate her identity's validity with Sara one-on-one. One of Sara's big points is that Reko didn't split the Clear Chips with the others, a display of selfishness the real Reko would never indulge in. The two continue to go head to head, until Reko cuts her off, saying Sara can't tell who the fake really is with her circumstantial claims.
Sara remembers Safalin's phrasing: "no human they haven't met." Memories of discussing the AI with Ranger and the doll of Joe in the Medical Office flicker through Sara's mind, and she makes the bold statement that the kidnapper's organization was created to make dolls of real people. Sara claims that the AI of Reko, combined with a doll of Reko, could create an imposter Reko, who is standing in front of them right at that moment.
Doubt begins to pervade through the room at that absurd-sounding conclusion. However, Keiji is open to the idea and asks Sara for proof that Reko is an AI. A curious Sou also brings up that Alice and Reko haven't seen each other since his arrest; That after not seeing each other for so long, Alice should've be thinking that Reko's changed, at least a little. Yet, Alice is confident that Reko is the same as she always was.
Reko promises she'll do anything to prove she's human, and Sara asks her to sing a song. The song is Reko's crowd-pleaser, "Samurai Onna."
They get interrupted by the countdown of the stinger, about to fire another shot into Gin. Q-taro comes to the decision to flip the switch too late, and a third dart hits Gin.
Keiji asks Ranger when the attraction will end, and he responds that it will when someone is sacrificed. Keiji tells Sara that there's an antidote in the Medical Office, and asks Sara to put an end to it all, to which she agrees.
Sara, having finally found the discrepancy between the real and fake Reko, asks Reko if the song she sang is one of Samurai Yaiba's. She says yes, which causes Alice to come to a realization. Sara shows the newspaper clipping detailing Samurai Yaiba's breakup. Reko remembers this happening after Alice's case, but Sara claims that she doesn't feel the emotional trauma it inflicted on her. Sara brings up her conversation with Ranger-- that the AIs have their memories updated every six months, but their personalities are only updated every three years. Therefore, this Reko's personality remains a keepsake of three years earlier, before Alice's arrest.
Reko begins to question her existence; crying, wondering if she really is a fake. Rangerstarkly confirms she is. He gives a rundown of the timeline of the switch. He says there were two problems-- the wound on her hand, and the fact that her personality hadn't been updated in two years and eight months.
Alice threatens to kill Ranger if he did anything to the real Reko. Ranger jeeringly expresses sorrow for the fake Reko, already forgotten in favor of the "real" Reko.
The fake Reko sobs, pleading for the others not to kill her. She's alive, too, and she's afraid to die. Sou and Kanna bring up that the doll Reko is just the same as a human at this point, one who can express sorrow through tears. Ranger maliciously reasons they could just sacrifice Gin then.
Reko begs Sara to keep her alive, and Sara has to make an agonizing decision.
Sara pushes a weeping Reko to the edge, but just as she's about to tip her over, Nao comes in with the final push, claiming that Sara shouldn't have to shoulder another burden. Gin and Q-taro's restraints unlock.
Sara and Nao look down the pit and sees the doll Reko, make-up leaking down her face from her tears, and notes the lack of blood from any of the piercing wounds. The group demands to know where the real Reko is, but the Floor Masters have already vanished. The Impression Room lowers to the floor.
Sara rushes to the incapacitated Gin, but Nao says that the two of them should search for Reko, instead, and that they should trust in Keiji. Sara, Nao, and Alice run to the Room of Lies, where Ranger is waiting for them alone.
Alice demands they give Reko back, but Ranger quizzes him first on where exactly Reko is. He laughs about the fragility of humans, where Safalin appears, with the decapitated head of Reko in her arms. Alice, incensed, rushes to kill Ranger. He throws the head at Alice, and he catches it, at which point the head blows up. Ranger apologizes that Reko's collar must've exploded, blowing a hole all the way through Alice's stomach. He collapses to the floor, bleeding heavily from his stomach. The sobbing Alice quietly calls for Reko, before succumbing to the injury and dies.
Footsteps approach from behind Sara, and a dumbfounded Reko -- the real Reko -- is left staring down at the bloodied body of her now-deceased brother. She had exited through a pillar in the back of the room. She yells to the dolls that they should've released her as soon as the head exploded, so she could have at least told her brother she was still alive.[1] Ranger asks if that would have made any difference, and Reko shouts it would have, charged with furious determination to kill him. He reminds her that killing a Floor Master means death for all of them, something she doesn't care about. She only wants revenge for Alice.
Sara can't bring herself to push Reko, even knowing that she's a fake. Reko thanks her, as Nao remains silent, and the third dart readies to fire.
Gin calls out for Sara and help as the counter ticks down on his wails. At the last moment, Q-taro hits the switch and the two swap places. He apologizes to Gin, saying if he'd just pressed it from the start, Gin wouldn't have to be so scared. The Impression Room lowers. Q-taro calls to an unconscious Gin that he can't die because he has parents to go home to. Nao drags a reluctant Sara out of the room to search for the real Reko. They head to the Room of Lies, where Ranger and Safalin are waiting with two Rekos-- the real on the left, and the fake on the right.
Ranger asks if the girls have ever heard about doppelgängers-- seeing a person who looks exactly like you, a phenomenon considered in some cultures to be a harbinger of death. A noise rings out through the room-- the collars of both Rekos have started going off. Ranger says they only need one Reko, and offers to let one of them pick who to save.
Sara is disenchanted, after having essentially abandoned Gin to save the Doll Reko, and now more lives are being pitted against another once again. Ranger snidely tells her to stop being so self-centered, disabusing her of the notion everything revolves around her, since Nao is the one who he's going to let pick which Reko survives.
Nao freezes up and Ranger produces a knife to break the stalemate-- the same one Kai used to commit suicide. The Reko on the right grabs it and threatens Nao to pick her, lest she get violent. She also says she'll take down Sara, too. Nao reasons she could never do that, because she's still a copy of Reko, and therefore doesn't have the ability to hurt her friends.
Nao picks the Reko on the left, which causes the fake Reko to yell out and attack the real Reko, stabbing her in the abdomen and killing her instantly. Yet, her collar doesn't stop beeping. Ranger figures it's because Nao had already made her choice. The fake Reko realizes that they'd never had any intention of letting her survive from the start.
Alice walks in on the scene, enraged, demanding to know why Reko is in this state. He refuses to believe Reko could die, and Ranger points out all the blood, saying the fake can't bleed. He indicates the fake headless Reko. He then taunts the still disbelieving Alice that Reko has been reduced to a garbage corpse.
Furious, Alice rushes to kill Ranger, who informs him that he'll die if he tries to kill a Floor Master.
Even if Reko is never asked to sing, if the notion of her being a fake is discussed, Q-taro will hit the button as in the "Don't push Reko" route. After the Impression Room lowers, the fake Reko will rush to the Room of Lies, where she discovers Ranger, Safalin, and the real Reko. The Doll Reko realizes that she is a fake before Nao and Sara arrive in the room. The scene continues in the same way as the "Don't push Reko" route.
A gunshot resounds through the room.
A surprised Ranger is left staring up at the gunshot wound in his forehead, as the Reception Doll, holding a gun, says Ranger's stepped out of line. Collapsing onto the ground, Ranger begs Reception Doll, his father, to fix him. He cajolingly says that he was the Reception Doll's greatest masterpiece when the Reception Doll queries whether he knew why Ranger was so human-like.
The Reception Doll claims that the real reason is that he imbued Ranger with jealousy; an inferiority-complex toward humans. He came to the realization that negative emotions are what makes a person human. However, that extreme humanity made Ranger a monster as well. Although, perhaps, that too is simply human. Either way, Reception Doll concludes that Ranger is a failure, before kicking his head clean off.
Reception Doll apologizes for the unsightliness Sara, Reko, and Nao had to witness and begins to explain the Main Game. Roles have been distributed to the tablets they all possess, but if one finds themselves dissatisfied with their role, they have the ability to trade it to someone else using the tokens they earned during the Sub-Game. Reko halts that conversation and demands to know the man's identity first.
He again makes to introduce himself as a mere Reception Doll, before deciding to do away with those niceties. Then reintroduces himself as Gashu Satou, a researcher into negative emotions, before announcing it's time for the Main Game to begin.
The chapter opens with a set of scenes separate from the present. The first begins with a scene much like the beginning of the game, where a voice asks if the listener has ever heard of a majority vote. It fades into the dark room with the paper shredder in it from the first chapter, where a shadowy figure of Sou addresses the listener, who advises them to kill decisively to ascertain survival. The listener is revealed to be Sou Hiyori, being taunted by himself. He hallucinates eyes and blood all over the room as he tells himself he needs to tear the papers off the wall and destroy them. He leaves the room.
He ends up in the hidden room, where he is collapsed in the darkness, with the laptop on the table. The laptop disappears and blood begins to pool around the body. Sou acknowledges that he has died. Just before he leaves, a hand reaches out from beneath the desk. He appears in the Main Game stage, where he finds and takes the frying pan. A voice begins addressing him, asking why he's even alive. A darkened figure of Sara declares that it's Sou's turn to die, before she attacks him with the kitchen knife.
Kanna wakes him from this dream. She begs him not to leave her, because he's all she hasleft. Sou tells her not to betray him. He calls for a beginning of their strategy meaning, with the two of them and Q-Taro.
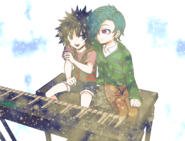
The next scene is a memory of a young Reko and Alice playing the piano and Alice asking if it's fun. Reko says she'll teach Alice how to play an instrument, but he better not get bored of it. The two of them promise to form a band together when they're older. This fades into Reko/Alice leaning over the deceased form of the other in the Room of Lies, depending on who was saved in the previous part. If Reko is alive, she will blame herself for everything that's happened in Alice's life, since she pushed him away, begging him to come back to life. She begs to be left alone. Nao will stay to support her. Sara returns to the Medical Office to meet up with the rest of the participants. Reko comes a little later, all her makeup washed off from her tears. If Alice is alive, he will laugh emptily with a smile on his face and say that Reko was such a good kid. Alice, exhausted, asks Sara to leave. When she pushes for them to gather in the Office, Alice wonders how she can be so kind, when they're just going to become enemies again in the Main Game. He says that he's continuously walked his path, but now, there's nowhere for him to walk. Nao takes the gloves from Reko's body, and gives one of them to a surprised Alice. Alice will then tell Sara that the name of the man he killed was Sou Hiyori, and then leaves.
Gashu announces that in three hours time the second Main Game will begin and that everyone's card roles will be randomly sent to their tablets. But also that with the use of the Ring-up Boxes that appear around the third floor, they can forcibly exchange cards with someone for 50 tokens.

While Sara first received a Commoner card, in order to establish trust with her in the short period of time they have together, Keiji trades her card with the Keymaster. He's on the hunt for more information in order to escape and he'd like Sara's help.
They find a distraught Nao in the lobby, and both of them figure something is off. Keiji lends Sara his aid, which translates to his partner ability, his detective sight, which allows him to see through the heart's unrest.
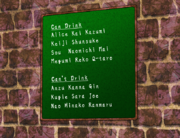
Together, they head to the Room of Rubble when they spot Gin finding a passage leading back to the first floor, specifically into the kitchen. They reason that Kai noticed this passage, and it's how the laptop ended up on the third floor. Initially, they lose sight of Gin and end up re-exploring the area before ending up at the locked Pink Room. The password is the number of kids who can't drink. In returning to the bar, Sara sees a vision of Joe sitting on one of the stools. She counts the number of names and unlocks the room.
The vent in the Pink Room turns out to lead to another room attached to a medical bay. While they couldn't get into the medical bay they did find surveillance equipment. They also deduce that Miley is actually human, as there's a static doll form of her collapsed in the corner, and the fact that Ranger didn't bleed (nor did the Reko doll if she was pushed), but Miley did.
On the computer screen in the room, the two see another victim video, of a man in a suit with a swinging blade behind him. The man begs for his life, then asks if they're all gathered for her sake. "Her" being Sara Chidouin. The blade catches up to the man and kills him. Sara truthfully claims to have no idea what he's talking about, and Keiji deduces that she has a connection to the death game. He wonders whether Sara will be their salvation or their downfall, and asks if he can bet his life on Sara. She asks quietly what happens should she be an angel of death, and Keiji asks if she'll die with him. Sara internally debates whether or not she can trust Keiji.
Through the glass, Sara sees what looks like a person in the medical bay.
They find a muted surveillance tape of their time on the first floor, ever since they woke up. The video also reveals that Sou's idea of trading cards, and the realization that seeing another's card is a fake rule, is due to him seeing Q-Taro distributing the cards. Sara recounts that she thought the role cards were all a trap set by Sou, but they see that Q-Taro initially placed them, and Sou picked them up. They also see Joe and Kai having a conversation. But because the surveillance video has no sound, Sara has no idea what they're talking about.
After they're done, they leave, and hear Gin shout out from the Pink Room. They decide to look around for him. In the cafeteria, they find a key on the table. They hear someone and duck into the kitchen, spotting Miley and a mysterious party. Miley tells this person to not let Gashu have his way, as he's trying to destroy the Death Game. She instructs them to keep watch of him from the monitor room, and collect Ranger's chip. Their tablets alert them of another trade, and Sara and Keiji manage to escape back to the third floor without being caught. Sara still has the Keymaster.
They head to the monitor room to look for Gin with the surveillance system. They spot Q-Taro speaking with someone from outside a room, and find a room with a Mishima AI on a screen beside the bed. This room belongs to Nao, and the AI claims that he was revived to protect her. She asks if some non-specific activity was really okay for her to do. Sara and Keiji figure something is off with the AI. Mishima had asked Reko to destroy him, after all. Gin is nowhere to be seen.
They head to the Room of Lies to recover Ranger's chip, but Safalin doesn't allow them to pass.
If Alice is alive, in the lobby, they will find him in the process of throttling Gashu, demanding to know where the exit is-- he had waited for an opportunity where Gashu was without his gun. He will say there is no exit as Sara tries to stop him, at which point he will reach for Gashu's neck to strangle him. He then notices Gashu is wearing a collar as well, and Gashu pulls himself away, instructing the participants to enjoy their time before the Main Game. The collar will be revealed later if Reko is alive.
Sou, Kanna, and Q-Taro approach them about sharing Kai's laptop, asking that they let bygones be bygones, Sou promising to work with Sara as partners. Even if she chooses to shake Sou's hand, she still senses malice from him. They all look at the laptop together.
On the laptop they find several messages from Kai, some files, and computer code. There's even a file detailing all of Sara's likes. In one of the files, titled To Miss Sara, Kai reveals he was raised as an assassin. He was tasked with protecting Sara from the shadows. He implies that the Death Game could be revolving around Sara herself, though he believes she is but a victim as well. He admits the organization he worked for is named ASU-NARO, startling Q-Taro, who says that was the name of his orphanage. They're the ones who had kidnapped the participants. He directs Sara to a folder titled after her.
They also find a file of seemingly nonsense computer code titled BACKDOOR.SMUT as well.
In the Sara folder, there are two files. The first is a letter to Sara thanking her and her family. The second is a background check file. In it, he details that he tried to assess the files for Death Game participants, but they were all protected, except for one. The un-encrypted file was readable because it had originally been deleted but then restored. Deletion of the file meant the person had died, but its restoration implies the person was revived. Bewilderingly, when they see the photo of this person, those around Sara react with alarm because they all recognize him, though from where, they don't know. Sara doesn't, but Kanna notes that he's wearing the same scarf as Sou. Sou himself leaves claiming illness. If Alice is alive he reveals that the man in the photo is Sou Hiyori, the one Alice had killed and gone to prison for. This throws the group for a loop, and Alice wonders how he could have ever forgotten his face. In addition, despite there being 20 participants, Kai admits that there were not enough files for everyone participating in the Death Game.
It is then that the third card trade is made and Sara receives the Sacrifice. This causes her to hallucinate Joe strangling her, but even as Keiji steadies her, it doesn't fade. Struck with panic, Sara runs to the Room of Lies to take Reko/Alice's remaining tokens from their corpse so she could afford to trade away the Sacrifice card. But, when she reaches the room, Safalin informs her she's cleared it away. Sara nearly falls into despair when Safalin tells her there were no tokens on the body anyway. If Alice is dead, Sara will find this odd, since he was a high placer.
Another hallucination of Joe fades in to torture her, but this time, she actually responds and talks to him. Joe taunts Sara for wanting to die so bad, and Sara admits that somewhere, maybe she did want death. She allows herself to be swept up by the hallucination, accepting his touch as she weeps.
Gin bursts in to free her, asserting that Joe isn't with them anymore. Sara asks why Gin is here, and he says that it's so he can cheer her up. He hugs her tightly and asks her to come back to herself and believe in the real Joe-- the Joe who smiled until the end, and would have wanted her to survive and escape.
It's time for Sara to finally face her hallucination head on.
She manages to push away the evil clutches of the false Joe that were clinging to her, and with renewed vigor, claims that she is going to save everyone and escape. No longer will she let the kidnappers have their way.
Gin replaces Keiji as Sara's partner button, and they decide to go interrogate Safalin. Outside the Room of Lies, Sara finds the victim video Nao bought. They wonder how it ended up there.
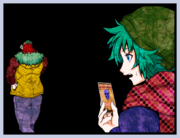
They find Nao in the Medical Office, who was looking for Safalin "for no particular reason." Using Gin's dog vision, Sara senses a scent coming from beneath the door behind which once stood the Joe doll. There's a passage behind it which they follow. In the back, they find dolls of all of the participants, including those who perished in the first trial, whom they never met. They venture further into the Doll Room, where they find some type of operating table, with Ranger's head on top.
The head of Ranger weakly calls out for his father, at which point a fourth card trade takes place, alerting Safalin to the presence of the two. Ranger curses Safalin for not letting him die. Safalin claims there's no fixing him, and that he will die in around ten minutes. She asks if he even knows who he is, and says Rio Ranger is not his real name. She says Gashu imbued inferiority into Ranger, and discarded all of his positive emotions, which Safalin was in charge of. Gashu stopped her from putting them in, turning Ranger into a warped doll. Safalin, in his last moments, had decided to give Ranger back his heart, as Ranger protests from the table.
All of the unwanted emotions fill Ranger as Safalin states he has been perfected. He has gone from a doll to a human with a heart, and christens him with the name Rio Laizer.
In his final moments, Laizer sobs violently with regret and remorse.
Safalin plucks the chip from Laizer's head and hands it over to Sara. She informs her that it can nullify security if used in the proper secret room.
They go back to the Medical Office and Sara checks her tablet, seeing that she's still the Sacrifice. Gin says they need to find the secret room, and Nao says she has an idea where she is, but Gin looks doubtful. Nao leads them to the hidden corridor, and then asks Sara if she can see the chip. Sara, suspicious, doesn't think she should hand over the chip. She says Nao doesn't seem like her usual self. She takes a breath and looks clearly at Nao like she did with Keiji. Sara says that she does trust Nao, and wants to share worries with her. Nao admits to lying, and apologizes before catching Sara off-guard and stealing the chip from her. Sou appears to commend her.
He asks what Sara is even planning to do with the chip, since she doesn't have the technical prowess to even use it effectively. He says he needs to analyze it on the laptop. He asks Nao to hand it over, but instead she steals the laptop from him, and runs back to her room.
They find Nao in the process of hooking the laptop up to the Mishima AI. He claims to be on their side, and that with the laptop, he can send them security data. Mishima pushes Nao to connect the laptop, as Sara insists there's something off with the AI.
She plugs it in. Mishima thanks her for being so easy to manipulate. The laptop and chip were detrimental to the Death Game, and says he's going to destroy all the data. The AI warns them not to run from the Death Game. But as it tries to attack the files, it's littered with errors. Nao voices her relief, and Sou does as well. The AI asks what she did, and Nao yells not to get friendly with her. Since the beginning, she never believed the AI was Mishima. Sou asks if Sara remembers the BACKDOOR.SMUT file, which was a hacking program used to extract data from the organization. It keeps attacking the AI, and eventually he vanishes.
Sou begins to work on the laptop, and Nao explains where the AI came from. At the beginning of the trading process, she said the AI appeared and demanded she get the laptop and the chip without telling anyone. She says she initially wanted to discuss with Sara, but she figured the AI would've expected it. So she created a plan with Sou to throw off the AI-- the best way to get it to trust her was to get into an altercation with Sara. Nao claims she's going to believe in Sou, and asks Sara to gather everyone in the lobby.
After, Sara and Gin head into the Medical Office, where she finds Safalin having a conversation with Reko/Alice in the dark.
If Reko is alive, Safalin will coerce her into using her memory erasing machine to forget Alice, only the bad memories. Reko refuses treatment, because without the bad memories, there would barely be any left. The lights flicker on, and Reko returns to the lobby.
If Alice is alive, the device will be hooked up to him already, as Safalin coerces him to use it. He asks if the device can really remove the memories of Reko. He agrees to use it. When the lights flicker on, his eyebags have disappeared, and he feels renewed. Sara and Gin voice doubt that he made the correct choice, but he leaves.
They find Keiji and Kanna talking in the ruined corridor, having a conversation. Keiji says he'll come to the lobby once he's done.
Sara finds Q-taro collapsed in the Room of Rubble, blood coming from his mouth, surrounded by a tablet and a strange device. He's still alive, just passed out. Gin recognizes the strange device as a one-use stun gun, without any power in it. Sara picks up the tablet, then calls for Keiji, who carries him to the lobby.
Once everyone has been gathered, the meeting begins. Nao says Sou went into the monitor room, where they find a ladder that has been dropped down the wall. It leads into a well-lit room with more monitors and a table, where Sou is using Laizer's chip to access security. He marvels at all the data contained within the chip, and wonders if he was meant to be a successor of some kind.
On the table, there's a set of papers, and a book. The papers are the Floor Masters' Code, which outlines rules for the Floor Masters. The rule Sara takes note of is the fourth one,dealing with misconduct in the Main Game. If the transgressor is a participant, they die, but if they are a Floor Master, the game will be retried in 24 hours.
The book is a memorandum titled That Incident. In the book, the writer details that in the first trial, they killed a person. From there, they decided not to trust a soul. In the following Russian Roulette, they did not participate. Sara realizes this person is writing about the same things they went through. They write that at the end of the discussion, the person chosen to handle the gun was a 17-year-old schoolgirl, startling Sara. They pen that in the first victim conference, the girl lost her best friend, and in the second, a young boy, and the man whose views most aligned with hers both died. Feeling pity, the writer decided to talk honestly with the girl. At the end, they had grown to admire her, so much so that they didn't mind dying if she was to live. However, in the third conference, she was killed. The writer cried for her, and sees hallucinations of her still. It ends mid-sentence with the line "As many women as I try to love, I'm never satisfied. Even now, to me, she is[,]" half done. Sara wonders what the book is.
Sou manages to break into security, and excitedly leads Sara back to the monitor room. The AIs come to life on all of the screens, and Sou reasons that the control system for them broke as well.
He calls out for the group to follow him to the Long Stairs if they want to escape. There, he pushes the vending machine aside, revealing a path behind it. Sou says that according to the blueprints, the exit follows this passage.
They find a very long staircase, with doors on the side. Sou posits that they're the victory stairs that can be accessed from any floor. They group have a discussion about what they'll do once they escape.
Keiji is the only one who doesn't seem to have an idea of what to do.
Sou spots something up ahead, and they step into a traditional Japanese room. Sou says that the room is titled The Winner's Room on the floormap.
When they go through it, they find a solid wall of rock-- the exit. Sou starts to panic, realizing that the room had caved in, rocks blocking the exit. Sou asserts that this must be a lie.
Gashu appears to state that this is the truth they all sought out, and that the exit had been blocked since before the Death Game began. If Reko is alive, he reveals a collar on his neck, the same that all the participants have, and says that they're all captives as well. Until the Death Game ends, their fates are intertwined. If Alice is alive, Gashu brings out his gun in warning for Alice.
Sara begins to lose hope, realizing that all that's left for her is the Sacrifice Card. The hallucination of Joe appears once more to ask what her plan is. When she answers,he wishes her luck and fades away.
The time before the Main Game begins to slip away.
Keiji sorts through the rocks. If Alice is alive, he will chastise Keiji for trying to do it without heavy machinery, but will start to clear rocks with him anyways. Sou sits in the Winner's Room, trying to find anything to help them on the laptop. Sara asks him to please save them. Crushed, he says he doesn't have enough time. He says the only thing he can do is hack the Role Card data.
Nao sits on the stairs, desolate, and Reko will be with her if she is alive.
Gin comes up to Sara and shows her a smartphone he found on the stairs. Before he can show her what was on it, the fifth card trade begins. Sara pulls out her tablet and sees that her Sacrifice has been switched with a Commoner. Gin comments that Sara had a scary smile. She asks what was on the phone, but Gin lets out a yelp of pain. Sara yells out too, feeling a sharp pain in the back of her neck.
Everything goes dark.
A strange vision follows this-- Sou is collapsed on the ground, bleeding, as a crying Sara holds him in her arms. Mishima and Q-taro are also crouched around him. Sou says he's done for, and Sara begs him to respond.
Sara wakes up, in a room similar to the one she was in before the first Main Game, perplexed by what she's just seen. Instead of Miley, Gashu is on the screen, and runs through the same rules of the Main Game the participants are familiar with. This time, however, as there's an even number of survivors, he makes an addendum: should there be a tie in the final vote, and the Keymaster is one of them, they take priority and everyone dies. The same is the case with the Sacrifice. If the Keymaster and the Sacrifice tie, the Keymaster has the right of way.
Miley interrupts the video feed to admonish Gashu for a certain transgression he committed, before Gashu quickly cuts her off and invites the participants to the stage of the Main Game.
The participants, confused by the earlier squabble between the dolls, enter the playing field. Gashu deflects questions about the transgression, saying that if there was an error, it should become clear over the course of the Main Game. Sara suggests they call in Safalin as an impartial judge, due to mistrust in Gashu. He calls for a start, but just as he does, he's interrupted by Q-taro arriving. With his entrance, the Game begins.
Sou starts by reminding them that they've been through this before, and Q-taro says that by this time, they're allies, so it's completely different. Gashu informs them that the card designs have been recorded this time and cannot be used as proof.
Keiji starts off by suggesting they decide on their four candidates. When Reko, if alive, points out the card trades, Keiji will say voting will be substantially more difficult if they sort out roles first. Reko will then state that Sou is the most suspicious, and that she's going to vote for him, and implores him to clear her of doubt and change her mind. Sou admits to not minding being the first candidate, and discloses that he has the Sacrifice. He then elects to nominate the next candidate, and when Sara disagrees, he asks why she's panicking. He nominates Kanna, pointing out that her only good point is sympathy. Keiji realizes that Sou is giving Kanna a chance to prove her worth, and the discussion turns to be about her actions during the Death Game.
Keiji reminds Sara about their time investigating, and says that her detective's intuition has followed her to the Main Game. Sara now has the ability to catch the reactions that others have when a statement is made, and continue the discussion like that. She notices Kanna react in shock to Sou saying she's only a hindrance, and coaxes information out of her by encouraging her to get angry. Kanna insists that she's not a burden, because she was the one who managed to hack the laptop first.
What she actually did was figure out a password, which she believes constitutes as hacking. She says that Sou was having difficulty figuring out the password himself, and at that point she noticed how clean he kept his hands, causing her to realize that she could use dirt tracked by fingers onto the keyboard to figure out the password to the laptop. She says she realized this before the trading phase began. Q-taro points out that this seems strange, since the supposed reason they shared the laptop was to figure out the password in the first place. From there, they reason that Sou's actual incentive for sharing the laptop was to get into the Sara folder. This shocks Q-Taro, who demands to know why Sou accepted his deal without disclosing any of this. Keiji asks that he elaborate on this deal.
Q-taro asked Sou to share the laptop, even bribing him with tokens. He says the reason he handed over the laptop in the first place was for Sou's tokens alone, but Sara points out there was an additional reason: Sou was blackmailing Q-taro with the knowledge that he placed the Role Cards, seen by her and Keiji on the surveillance footage. Keiji pressures him to admit where he got the cards.
Taking off his hat, Q-taro calls the existence of the security cameras into question, since they found nothing of the sort on the first floor. He suggests that dolls of the two were used to fabricate the footage. With this admission, he considers the issue settled, but Sara continues to push him. She asks why he was knocked out in the Room of Rubble, and Q-taro claims not to remember. The group decide to establish alibis to figure out the culprit. After being interrupted by the Card Trade, Sou went to the bathroom and later talked with Nao, Kanna went to deliver the laptop to him, Keiji stayed in the lobby, Gin was on the first floor, and Sara had run off. Q-taro spoke with Keiji in the lobby before heading to the Room of Rubble.
When Sara asks Sou about his alibi, he expresses relief that Q-taro wasn't harmed heavily by the stun gun, and Sara brings up that only she and Gin knew about the weapon, since they took it in secret. The only other one who should know is the culprit. Sou admits to knocking him out because he didn't want anything to get in the way of his hacking plan, but Sara figures that there was something deeper. Keiji tells her that they should move on, because he's not going to explain himself further, so they turn the discussion to other suspicious activities undertaken by the participants.
Nao is worried about the victim video with Keiji, Gin saw the victim video with the man who said Sara's name, and Keiji wonders how Gin even found the passage to the first floor at all. Sara presents the victim video that Nao had dropped outside the Room of Lies, and Nao reveals that the man who left the woman to die looked very similar to Keiji. Sou asks him whether the video is real or not, but soon turns responsibility to Sara, whom he figures Keiji will answer to. The pair enter a War of Words.
Sara points out that Keiji hasn't disclosed his First Trial, and that she saw the video herself. Keiji says that it may be falsified, like Q-taro suggested earlier, but Sara retorts that the victim video had sound, while the surveillance footage didn't. Keiji asserts that he has no relation to the woman, but Sara points out her police uniform. Keiji relents, and tells the group the video is a real, and is of his First Trial. He identifies the woman as Megumi Sasahara, his boss on the force. She was his trainer, with high hopes for him. After Keiji shot an unarmed criminal on the job, Megumi made a backroom deal to keep Keiji from being punished. Since that day, Keiji has felt horribly indebted to her, expressing extreme distress at having killed her. He reveals that he's not a policeman anymore, and apologizes for lying to them.
Safalin tells them that it's time for the preliminary vote, and Gin says it's been too short a time. Safalin reminds them that this Game, they have to be allotted more time to sort out the Card Trades. Instead of deciding who to vote for, they settle for discussing who to leave out. Gin, Kanna, and Sou suggest not voting for Sara for various reasons, Reko suggests Sou because he insisted on being the Sacrifice, Keiji reasons leaving out Q-taro to extract more info, Q-taro rallies for protecting Kanna and Gin, and Nao thinks they shouldn't vote for Gin, as he wouldn't have the tokens to trade away the Sacrifice, should he have received it.
When Sou mentions the last trade before the Main Game, Sara catches a look of fear on Q-taro's face. He had been unaware of that fact, and knowing it, thinks he's figured out who has Sacrifice. He discloses being the Keymaster-- he had traded away his own Sacrifice to Sara and received her card, and presumes she still has it. When she's about to speak up more about being a Commoner, she realizes that it may be beneficial to have the others assume she's the Sacrifice, since it will keep her safe from being voted for.
Gashu tells them it's time to vote. Keiji, Nao, Kanna, and Sou proceed as candidates for the final vote. Sara is inundated with relief, and Q-taro is surprised that she received no votes. She asserts that she's not the Sacrifice.
The candidates fall to a troubled silence, and Sara pushes them to keep going. Each of them, roles notwithstanding, need to move in the same direction. Those who are safe start the discussion-- what were the details of each card trade?
Q-taro says there were only four card trades, meanwhile Gin states that he was a Commoner through each of the five trades. This discrepancy shocks Q-taro; he remembers three trades, and heard that there was one before the Main Game. He says he started with a Commoner, and this clues Keiji into the secrets behind most of the trades, since he initiated the first trade: his Keymaster for Sara's commoner. From there, someone traded their Sacrifice to Q-taro, and in the third trade, he traded his to Sara. Keiji asks him to explain the third trade.
If alive, Reko will admonish Q-taro for trading on the spot and acting innocent. This causes him to react, and Sara asks why he's not denying having traded the Sacrifice. They were all in the lobby at the point of the third trade, except for Sou and Gin, so the group would have seen him use a Ring-Up Box. Q-taro admits that the Sacrifice trade was Sou's doing. Instead of going to the bathroom, he made the trade, revealing that it's possible to force two people to trade, a fact Keiji catches onto. He demands Sou reveal his real reason for sharing the laptop. The two enter a Balance Battle.
Sara affirms Keiji saying Q-taro couldn't have made the third trade, affirms Sou saying he found out about the Sacrifice by looking at Q-taro's tablet, affirms Keiji saying Q-taro negotiated with him outside his bedroom door, denies Keiji saying he let Q-taro inside his room, and finally affirms Keiji's theory that Q-taro slipped the tablet under the door to propose his deal. Keiji reveals that outside of the Sara folder and tokens, Sou's true objective was to control the Sacrifice card. That was why he agreed to work with Q-taro.
Q-taro tells the group that his First Trial involved setting up the props used for the Death Game-- the surveillance video was real. Because of this, he feels responsible for Kai's death, and wanted to get his laptop back. For this same reason, he gave Sou one hundred tokens, keeping enough to make one trade himself. Sou had sent the Sacrifice to Sara in hopes that she would reveal her true nature, and posits she made the fourth trade.
Sara insists that she didn't have enough tokens, and Nao and Gin, who were with her at the time of the trade, corroborate that she didn't make it. He infers that she had Keiji do the trade for her-- the two had a plan to give Keiji the Sacrifice, and have him win the vote, killing everyone save the two of them. He further reasons that the fifth trade was a bluff. Nao points out that Sou admitted to being the Sacrifice in the beginning, but he says that was a lie, and that he was a Commoner the whole time. Keiji cuts him off as he begins to rally for voting for Kanna. He says he doesn't have any tokens, and discloses that he is the Keymaster. Sou begins to object, saying that role belongs to Q-taro, but Q-taro asserts that he's the Sage, and confirms Keiji's words. The two admit to being in cahoots, and the fourth trade was between them. They teamed up after Q-taro was betrayed by Sou.
Keiji reveals that he made the fourth trade himself, while Q-taro was passed out, knowing that he was the Keymaster with the power of a certain card. Gin points out that Keiji admitted to not having any tokens, and Q-taro says that he gave him his remaining ones. Sou demands how Keiji knew who the Keymaster is, since the only way to know who it is is by having the Sage card during the Main Game. Keiji says that via the tablet, he was able to use clairvoyance. There's no need to discuss the fifth trade, he figures, since Sou already revealed that he was a Commoner, and is safe to vote for. Sara, however, notices something off about Keiji's story. He had told Sara that he had traded her his Keymaster at the beginning, but is now claiming that at some point, his Commoner was switched to a Sage, which doesn't fit into any of the trades. She realizes he had the Sage since the beginning and forced Sara and whomever had the Keymaster into trading, meaning he lied to her.
Sara and Nao push to discuss more, finding something wrong with the fifth trade, but Keiji remains completely complicit in voting for and killing Sou. Sara objects, and he reluctantly lets the discussion continue. They turn to discuss the roles of the four candidates-- Keiji is the Keymaster, Sou is a Commoner, and either Kanna or Nao is the Sacrifice, that's what they've managed to deduce thus far. Q-taro asserts that Sou didn't have the ability to do anything weird with his tablet, since he kept it on him at all times. Sara brings up that he had passed out and retrieved his tablet before the Main Game, and she has his first one. She reckons that Sou took the tablet from him while he was unconscious. Keiji realizes that depending on when Sou saw his tablet, he could have seen through their whole plan, meaning he's only been acting confused the whole time. Sou plays coy, and puts forth the next discussion topic: who out of the four is the safest to vote for.
Gin brings up that Nao hardly had any tokens, and Kanna had much more in comparison. Therefore, she couldn't have taken the Sacrifice from Sara, and is a safe bet. Sou suddenly recalls a method anyone could use to obtain more tokens-- taking the tokens off of the dead Reko/Alice. Sara remembers the body's tokens having disappeared when Nao was investigating the Room of Lies. Q-taro says anyone could have taken the tokens, meaning anyone has the potential to be the Sacrifice. The group needs to discuss the actions of Kanna, Nao, and Sou at the time of the fifth trade.
Sara figures out that Kanna had been looking for the smartphone she'd dropped, and that Gin picked up on the stairs. Sou says she probably dropped it when they were climbing the stairs, but Sara responds that would have been impossible, and that she dropped it while descending, which besets Sou. Gin points out the message on the phone, which has changed, and instead now is a promise from Kanna to her big sister that it's time for her to become the protector. However, since Kanna's sister is already dead, that leaves but one option: the big sister in question is Sara.
Kanna admits to wanting to save Sara by any means necessary. She returned to the third floor, used the Ring-Up Box, and traded the Sacrifice to her from Sara. Sou tries to keep her from admitting this, but she says that she made the fifth trade. Keiji realizes that the reason Sou acted the way he did earlier was to sway the votes to Kanna, as it would be the only way for her to survive.
Kanna explains the secret of the fifth trade, admitting that she felt like a burden, and had a feeling that Sou had sent the Sacrifice to Sara, and she didn't want to let Sara die or make Sou into a murderer. Oddly enough, she states that she received a Commoner, not a Sacrifice. The group is thrown for a loop, and Sara is left to discern the absolute truth behind the Sacrifice.
Nao reasons that the only person who could have caused an irregularity was Sou, with his hacking, but Q-taro points out the transgression mentioned before the Main Game. Sara deduces that the transgression was interfering with the card trades, and that there has to be a reason for this. She demands a retrial, as per the Floor Master's code, should they expose Gashu's error. He agrees he will comply with the code.
Sara asks Sou if he will tell them whether or not he hacked the card data, but he first confirms Kanna's role with her. After this, he admits to not touching the data. He promises to work together with the others to figure out the transgression.
The group is left scrambling to figure out his misdeed as time ticks down. Sara presents the last piece of unused evidence-- the four mysterious papers obtained from Miley. When she brings them out, Gashu becomes extremely flustered, and curses Miley for handing over internal documents to participants, but refuses to explain what the roster means. They begin to dissect anything suspicious about the sheets.
Sou notes that there's four participants not listed on the sheet. Gin recalls the names written on the blackboard, and says that there's five names missing-- Kai, Sou, Kugie, Joe, and Nao. Sara points out this discrepancy, and Sou backpedals, saying he miscounted. She thinks there's something important with his mistake, since if there are 20 participants who were gathered, 16 names on the roster, and five missing, it doesn't add up-- there's one too many. They compare the names on the blackboard to those on the sheets, and the only person who's not on the blackboard is Shin Tsukimi. Sara realizes that Shin is one of the participants among them, and that someone is using an alias. Going by that, Keiji says the Shin in question has already been identified-- it's someone who isn't on the roster, meaning it's either Kai, Sou, Kugie, Joe, and Nao.
The participants vouch for the legitimacy of every name. Sou says his name was written at the Prize Exchange, but Keiji figures he's lying, since although there were photos at the Prize Exchange, there were no names written. He asks why Sou is afraid to admit the truth, and ultimately refers to him as Shin Tsukimi. Sara manages to draw the truth out of him by encouraging him, and he says he'll tell them everything. The roster was the same one he received at his First Trial, and the percentages are the victory rates of each participant. Sara realizes that they used the AIs to run digital Death Games to ascertain the rates, and Sou points out his own percentage: 0.0%, certain death, claiming this as his reason for affecting a fake name.
Sou recounts his First Trial, a very similar scene to the beginning of the game. His own shadow taunts him about how he will be eaten by the strong, and in turn, he threw Shin Tsukimi away, becoming the person he is now.
Gashu and Safalin tell them it's time to vote. When they retaliate, Gashu asks whether knowing the truth of the roster helped them figure out what his transgression was. Sara, desolate, wonders what else she can do. Sou begs Sara to win them an extension, and confesses that he destroyed his own monitor.
With the Shin issue cleared up, there's now four people not listed on the roster-- Kai, Kugie, Joe, and Nao. Sara asks Sou if he learned anything else in his First Trial, and he remembers that the kidnappers used the term "candidates" rather than participants. Nao wonders if they used the monitor room to run the tests of the Death Game-- each monitor contains an AI of a "candidate" who survived the First Trial.
Sara pieces together the difference between the two terms. A participant is one of the 20 people brought into the Death Game, meanwhile a candidate, one of the names on the roster, is someone who fills the qualifications to become the winner of the game. Further, she realizes that if Gashu were to make a transgression, it would be to aid in killing a non-candidate, which is why he tampered with the Sacrifice. By this logic, she already knows who among them is the non-candidate, and more importantly, who has the Sacrifice.
She points out Nao-- the only one not on the roster nor on a monitor. She was who Gashu tried to kill.
Having his transgression called out, Gashu hails Sara as the chosen one. Sara, relieved that she's managed to win an extension, lets herself relax. Nao apologizes for not speaking up about having the Sacrifice. Keiji demands Gashu tell them the secret behind the candidates and the Death Game, but he simply gives them one hint-- to think about their upbringings. He tells Sara she overlooked something in the Floor Master's code; should the transgression be exposed, either the Main Game is retried in 24 hours, or the transgressor dies. To keep the Main Game afloat, Gashu takes responsibility and shoots himself in the head.
The group falls into a panic. They beg Safalin to let them retry, but she apologizes, saying that she needs to abide by the rules or they will all die. Nao shuts down, and the group are forced into their final discussion.
Since Keiji is the Keymaster and Nao is the Sacrifice, they can only safely vote for Kanna or Sou. Kanna asks for the group to vote for her, since Sou is much more talented and integral to their escape. She urges them, in exchange, to believe in Sou. This request sends Sou into a rage, and he pleads angrily for the group to vote for him instead. Kanna says they need to trust their beliefs and choose logically, and Sou screams for her to stop.
Safalin calls for the vote to begin. Keiji votes for Kanna, and Q-taro and Reko vote for Sou. Kanna and Sou both vote for themselves, making the vote 3-2, his favour. Gin votes for Kanna to tie the vote, while Sara is given the responsibility of picking the winner of the vote.
Nao, in desperation, asks Sara to vote for her so she can win by a tie for first. She promises to save Sara, and the two can return home together.
Sara is now shouldered with the burden of picking who lives and who dies.
Sou laughs to himself as Safalin reads the results-- they had correctly deduced the roles of the Sacrifice, Keymaster, and Sage, as Nao, Keiji, and Q-taro, respectively. Nao thanks Sara for not voting for her and creating a situation where she was forced to betray everyone.
Safalin gives Sara an instant death switch, which she says she must press unless she wants Nao to suffer horribly. If Sara tries to push the button, Nao will scream out for her to stop, bawling that she's afraid to die.
Nao expires.
A short scene of Nao, finally together with Mishima in the afterlife, follows. If Alice is alive, Reko will be standing beside her.
Sara, at her wit's end, begs Safalin to stop. Sou declares his intent to live, taking off his collar, and running for the exit. The defense system activates and weapons shoot into Sou, causing him to bleed profusely. With tears running down his face, he tells Sara there's one thing wrong with her reasoning, and that his answer will be his final present.
She runs into the Room of Rubble to find Sou's bloodied corpse collapsed over the table. Seeing his body, Sara falls to the floor, overwhelmed by her powerlessness. No matter how much she struggles, she can't save anyone. She realizes belatedly that in his final moments, Sou had been using the keyboard. The monitor comes to life.
An image of Joe appears on the screen, and he asks what's going on. Logically, she knows that an AI of Joe shouldn't exist, but Sara breaks down crying anyways, venting everything that's been weighing on her since the beginning of the Death Game-- the responsibility she feels for the deaths of everyone, including Joe. The AI tells her to get ahold of herself.
He starts to recount their time together in school, all of the things they did, and how much fun they had. He says that he feels nothing but gratitude for her. The AI has no memory of the Death Game, but he says he'll always trust Sara, and that he'll always follow her. Joe tells Sara that she's his best friend and he loves her, verbatim from his last words before his execution. Sara reaches out to touch the monitor, and promises to not cry anymore, asking Joe to look over her. The image fades away.
The last vestiges of Sara's hallucination release their hold on her, and Sara, reinvigorated, returns to the group in the lobby, commanding that they're going to end the Death Game by their own hands.
A scene follows of a man in a suit speaking to Sara in the Winner's Room, and he identifies himself as her father.
It's time for the final Death Game to begin.
Sou yells that he'll never forgive Sara, and Kanna asks Sara for a hug before her death, which she obliges to. Safalin reads the results-- they had correctly deduced the roles of the Sacrifice, Keymaster, and Sage, as Nao, Keiji, and Q-taro, respectively. Nao thanks Sara for not voting for her and creating a situation where she was forced to betray everyone.
Safalin gives Sara an instant death switch, which she says she must press unless she wants Nao to suffer horribly. If Sara tries to push the button, Nao will scream out for her to stop, bawling that she's afraid to die.
Nao expires.
A short scene of Nao, finally together with Mishima in the afterlife, follows. If Alice is alive, Reko will be standing beside her.
Sara begs Safalin to stop, and Q-taro steps in front of Kanna with Gashu's gun, threatening to kill her if she comes any closer to Kanna. He reasons that she's different from Gashu and Miley, since she seems to have regret, but she claims to have always been their enemy. She approaches, and when Q-taro tries to fire, they find the gun is empty.
Kanna assures them that she's okay and thanks the group, instructing them to take care of Sou. Her execution -- The Human Flower -- begins. Seeds are spread through Kanna's body, and flowers begin to bloom. Safalin says she won't be in pain, but Kanna still cries out in agony.
Kanna expires.
Sou, tears in his eyes, vows to kill everyone who killed Kanna, starting with Sara.
An empty, depressed Sara returns to the third floor to search for him. In the Room of Rubble, she finds the monitor on, and a picture of Joe flickers to life. Logically, she knows that an AI of Joe shouldn't exist, but she's elated anyways. The AI calls her a murderer, and Sara realizes she shouldn't respond to it, it's a manifestation of her hallucination, but the AI continues to badger her, asking who she killed this time.
Sara, having trouble breathing, shouts at the AI to forgive her. The AI asks if she knows how much he suffered, and forces her into a flashback of Joe's death, which flickers through her mind over and over. She screams out, and loses consciousness.
She's awoken by Keiji in her own room, with everyone crowded around her. Keiji reasons that the Joe AI was set up maliciously to upset her, and Sara is completely confused.
She asks who Joe is.
Nao thanks Sara as dread quickly fills the rest of the group. This outcome has solidified Sou's prerogative-- that the strong will pretend to be your ally, before betraying you for their own personal agenda.
Sara, completely exhausted, has grown sick of the Death Game, and only wants to go home. Safalin carries out everyone's executions as Sara struggles to keep her ears shut from their screams of pain. Nao hugs Sara gently as she discusses the happy, domestic life the two will live, for the sake of everyone who died.
She promises to bear the cross for Sara, and repeats over and over in her ear that she did nothing wrong.
Back to Home, The 12 participants, Floor Masters, The Dolls, Chapter 1, Chapter 3, Part 1